On this page
- Press Shift Command 5.
- Choose the whole screen, a window or a part of it.
- Under Options, pick a microphone. On macOS 27, also tick Include System Audio.
- Click Record. Stop with the button in the menu bar.
1. Record with the Screenshot toolbar
Every Mac has a screen recorder built in. It works the same on a MacBook, an iMac or a Mac mini.
- Press Shift Command 5. A toolbar appears at the bottom of the screen.
- Choose what to record: Record Entire Screen, Record Selected Window (macOS 26 and later) or Record Selected Portion, where you drag a frame around part of the screen.
- Open Options to choose where the file goes, set a timer, show your clicks, and turn on sound (next section).
- Click Record. With a whole screen or a window, you can also click that screen or window to start.
- To stop, click the Stop button in the menu bar, or press Command Control Esc.
The recording is saved to your desktop as a .mov file, named “Screen Recording” with the date and time. A thumbnail appears in the corner for a few seconds: click it to trim or share the recording straight away.
2. Add sound: your voice and the Mac’s audio
By default the built-in recorder records no sound at all. There are two kinds of sound, and they’re switched on separately.
Your voice (the microphone)
In the toolbar, open Options and pick a microphone under Microphone: the built-in one, AirPods or a USB mic. This works on every recent version of macOS.
The Mac’s own sound (system audio)
This is the sound of a video, a call or an app playing on your Mac. On macOS 27 Golden Gate or later, open Options and choose Include System Audio.
On macOS 26 and earlier, the built-in tools can’t record it. You need an app that can, such as Screen Studio, CleanShot X, Tella or OBS Studio. We compare them in the best screen recorders for Mac.
Tip: wear headphones if you record your voice while sound plays on the Mac. Otherwise the microphone picks the sound up again and it echoes.
3. Put your face on the recording
Seeing who’s talking makes a walkthrough much easier to follow. The built-in recorder doesn’t show your camera, but there are two ways to add it.
The free workaround: QuickTime on top
- Open QuickTime Player and choose File › New Movie Recording. Your camera appears in a window.
- Choose View › Float on Top, make the window small and drag it to a corner.
- Start a screen recording with Shift Command 5. The camera window is recorded along with everything else.
It works, but the window is square, its controls appear when the pointer passes over it, and it may not stay on top of apps in full screen.
A screen recorder with a camera bubble
Apps made for this put your camera in a round bubble that stays on top and moves out of the way. In PlumCam, for example:
- Click New recording, then pick a screen or a window.
- Choose your camera and microphone. The preview shows exactly where your bubble will sit; drag it to any corner, make it bigger or blur your background.
- Click Start recording. Stop with Option R, or from the timer in the menu bar.
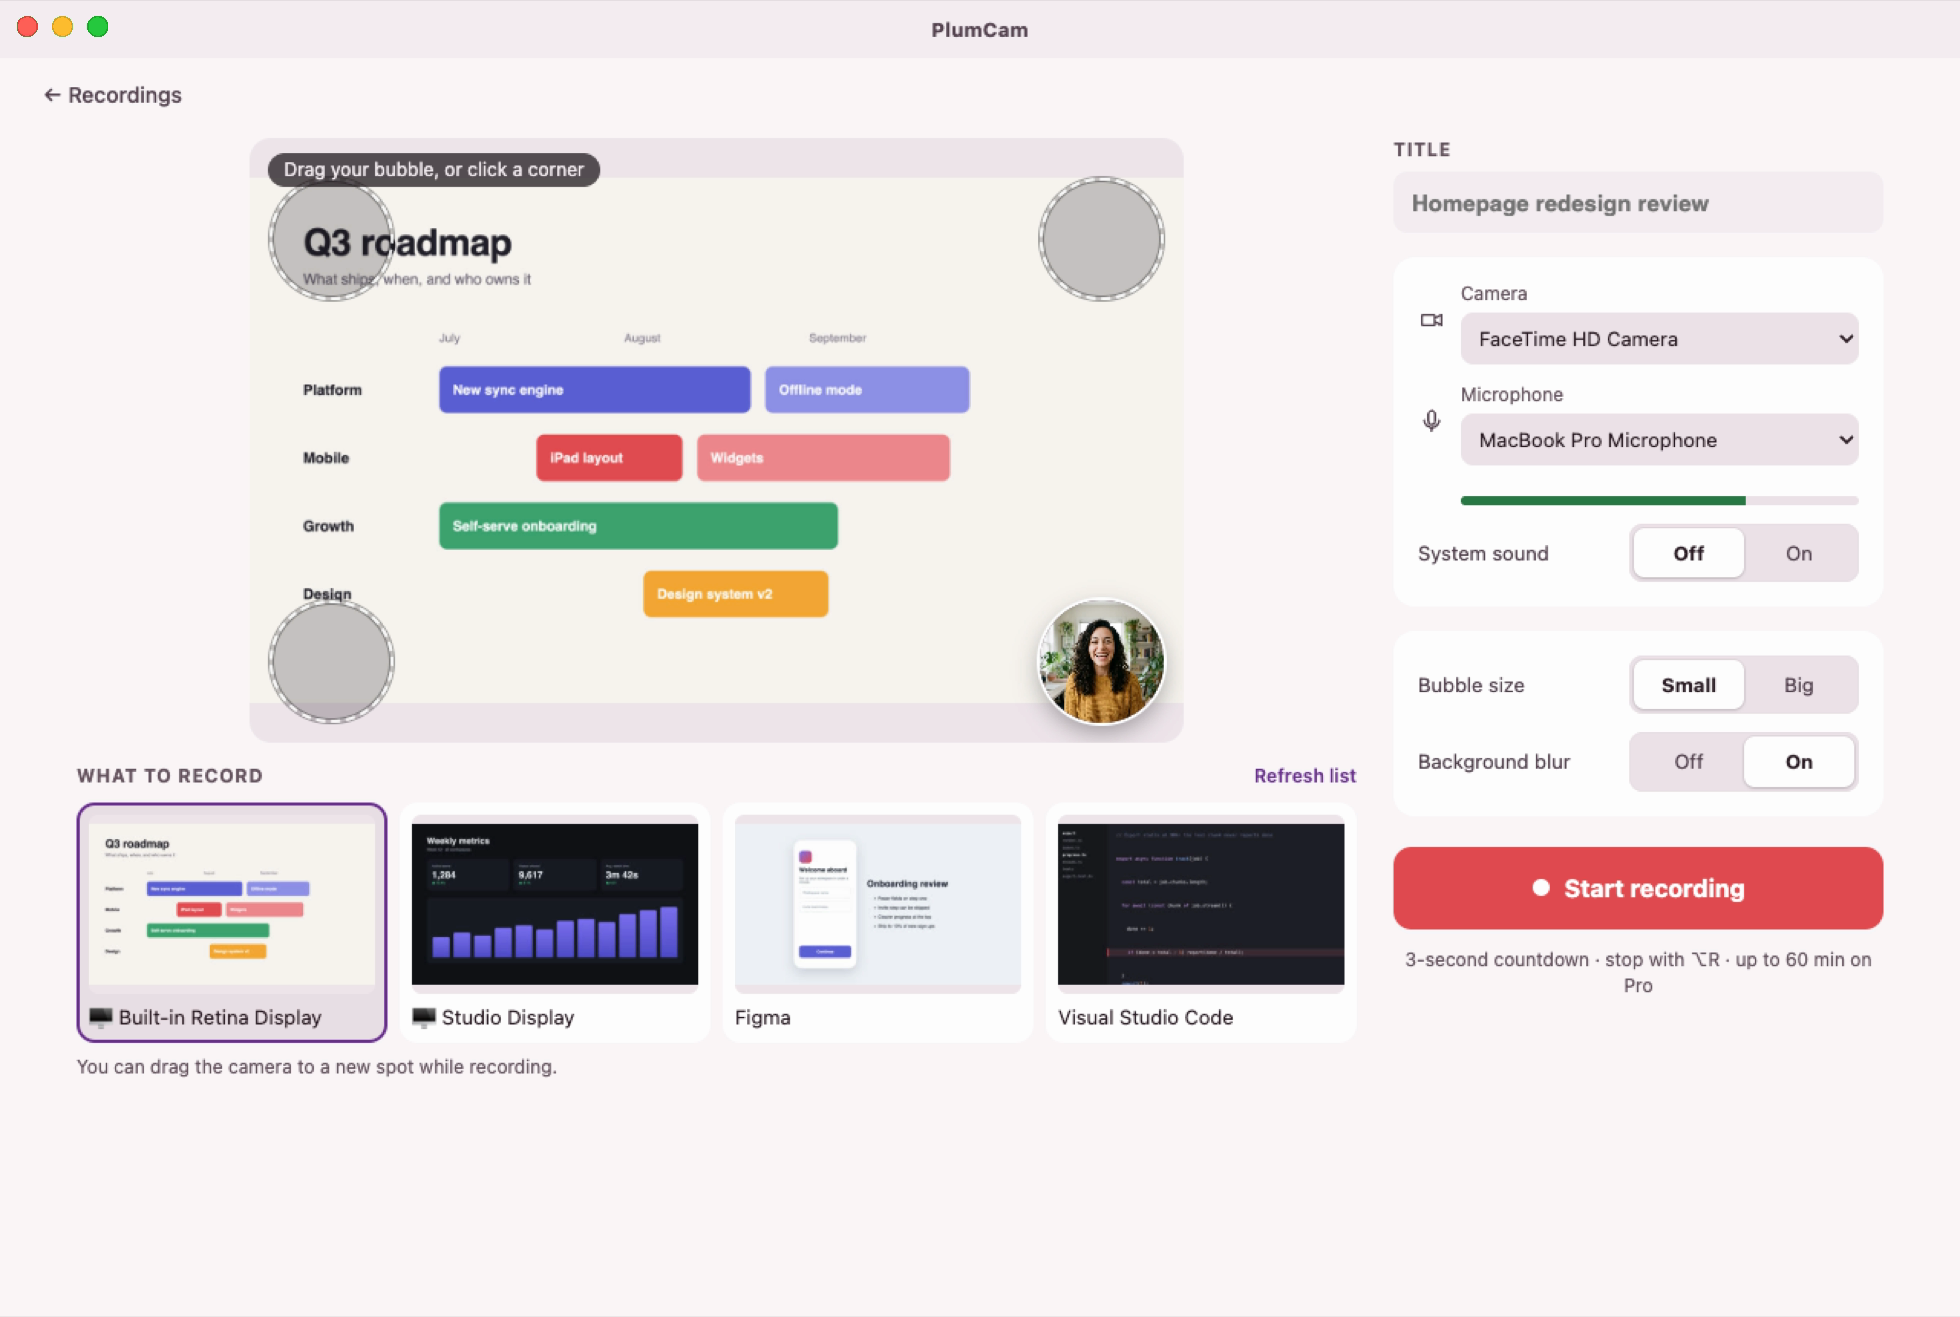
PlumCam records your screen, camera and microphone.
4. Record with QuickTime Player
QuickTime Player can start a screen recording too: choose File › New Screen Recording (or press Control Command N). It opens the same Screenshot toolbar, with the same options, so the result is identical.
QuickTime is more useful for recording just yourself: File › New Movie Recording records your camera and microphone, with no screen.
5. Find, edit and share the recording
- Find it: on your desktop, unless you chose another folder under Options › Save to.
- Trim it: click the thumbnail that appears right after you stop, then the trim button.
- Share it: screen recordings are big files, often too big for email. Upload them to a cloud drive and send the link instead.
If you record often, a dedicated app saves the steps. PlumCam, for instance, keeps your recordings in a library with folders, lets you cut out mistakes and add captions on Pro, and uploads to your own Google Drive with the link copied for you.
Questions
How do I stop a screen recording on a Mac?
Click the Stop button in the menu bar, or press Command Control Esc.
Why does my Mac screen recording have no sound?
The microphone is off by default. Press Shift Command 5, open Options and choose a microphone. The Mac’s own sound can be recorded by the built-in tools only on macOS 27 or later, with Include System Audio.
Where do Mac screen recordings go?
To your desktop by default, named “Screen Recording” with the date and time. Change it under Options › Save to.
Can I record just one window?
Yes. On macOS 26 and later, choose Record Selected Window. On earlier versions, choose Record Selected Portion and drag the frame around the window.
How do I record myself on a MacBook?
To record only the camera, open QuickTime Player and choose File › New Movie Recording. To record your screen and your face together, use the QuickTime workaround above or a recorder with a camera bubble.
Your screen and your face, in one take
PlumCam is free to start. Pro’s first month is free, then $9.99 a month.